My first change was to make a new nut that fits properly. The width of its flat now closely matches that of the slot and is long enough to prevent twisting when the pins clear the notches. Now the jaw can be moved forward or backward and a little light levering of the screw will nudge the pins naturally into the next notch.
As far as I know, these vises are all of unknown offshore manufacture and probably vary somewhat in actual size so a replacement nut needs to be custom fitted. I used a piece of 5/8 square CRS for the nut and 5/16 diameter 12L14 for the pin. I knurled the center of the pin and then pressed it into the nut. The screw hole is tapped 5/16-18 about .9” deep.
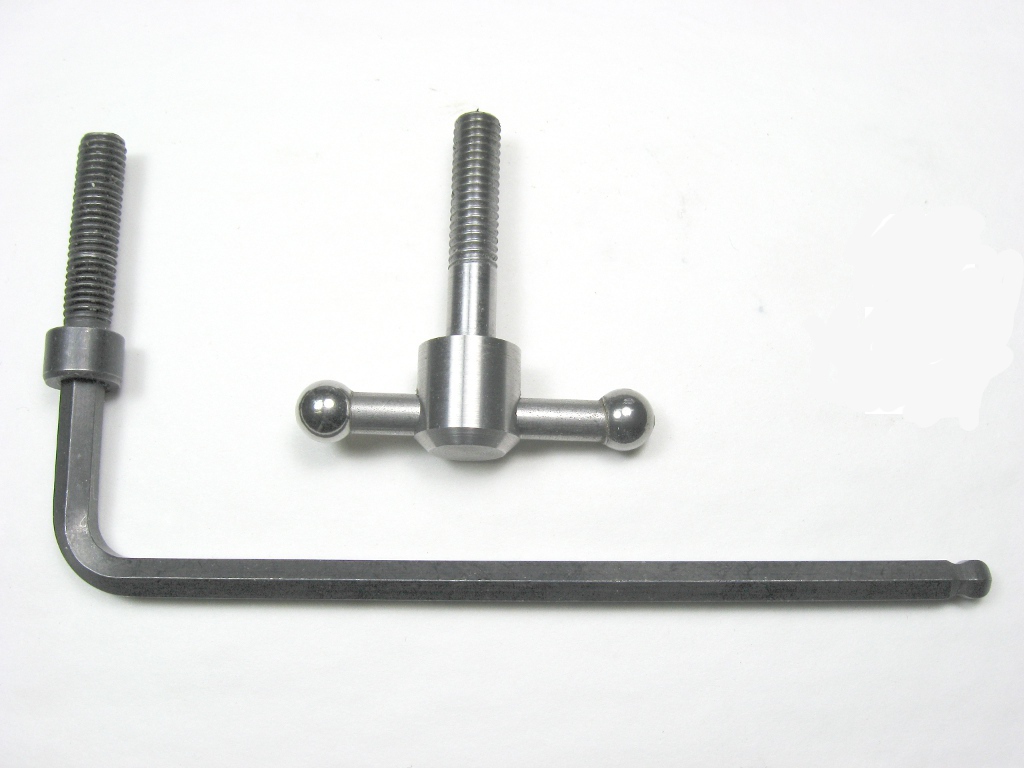
Of all the vises in my shop, this is the only one that doesn’t have a built-in way to open and close the jaw. It’s useless without a cumbersome hex key that always seems to be just out of reach when you need it. Functional, certainly, but not at all user friendly.
It’s a pretty easy job to make a new screw with a captive tommy bar. The makers could probably turn them out for pennies apiece. But they don’t, so I made my own, shown here with the device it replaced. Alternatively, even a hex bolt with a Lee Valley snap-lock knob is an improvement over the original socket head cap screw.
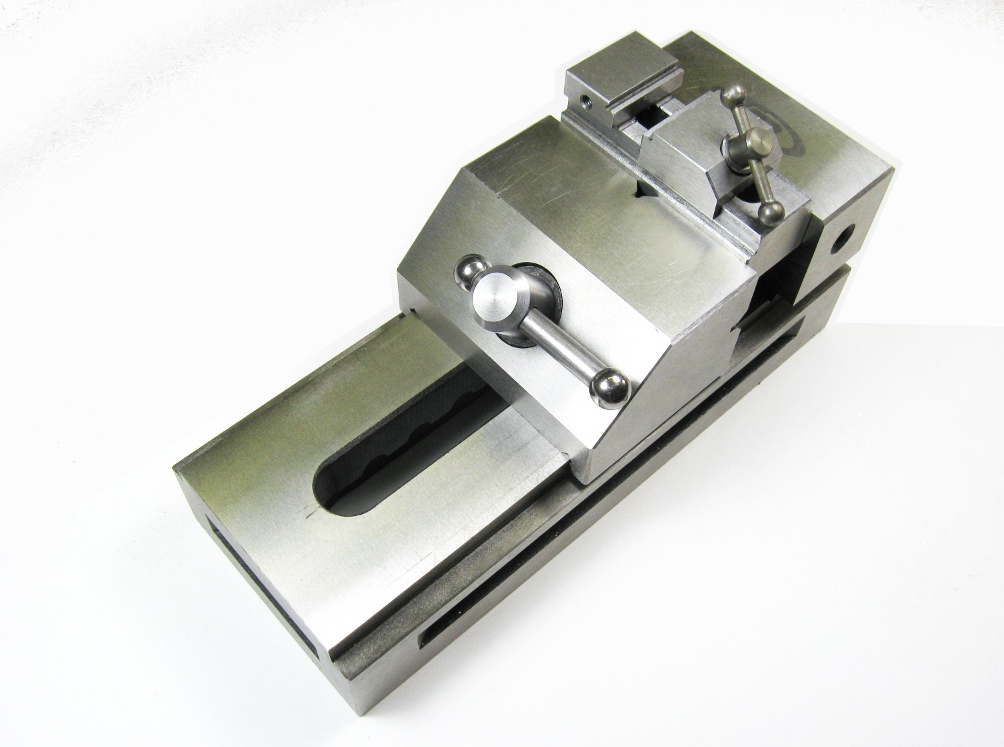
Here is the final result. I’ve been using this modified vise on my Taig mill for several years now with complete satisfaction. The basic vise is so good that the small amount of work to improve it was more than justified.
The little vise-in-vise had exactly the same problems in miniature and was modified in the same way as the big one.