I chucked a length of 1/4" mild steel (might be free machining, but I'm not sure as it came from the scrap bin) in a collet.
Notice that I have a dial indicator hooked up to the Taig - this is handy for small work with a variety of lengths.
I recently found the time to get back into my airgun hobby, which means getting a bunch of poorly working airguns back into order. The Crosman 150 is a CO2 powered .22 caliber pistol that was made between 1954 and 1967. I stripped the pistol and resealed it with a new valve and o-rings from Bryan & Associates. The only part that was missing was the #140-52 bolt screw (download the exploded diagram and manuals for any Crosman air guns here), which connects the loading sleeve and the breech bolt. I say "missing" because I had it when I stripped the pistol years ago. The head of the screw was cracked, with half of the slot gone. When I started to recondition the pistol I found the screw again after some searching in my piles of stuff. I drew it up in Rhino and then promptly lost the screw again. It's somewhere in the house...maybe I'll find it and add a picture, or maybe it's lost forever. Good thing I drew it up! UPDATE! I found the screw behind the leg of my bench. Pictures at the bottom.
|
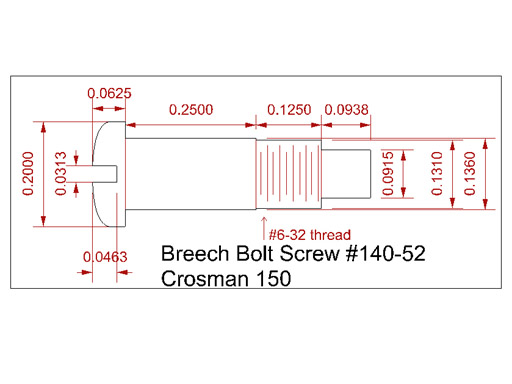
Here's a drawing of the screw. Slot depth and head profile were a guess, and the head profile was done with files as seen below. Most measurements seem to be fractional in nature and were taken directly from the screw. No tolerances are specified,you may need to tweak to fit your pistol if making a replacement. Mine had a #6-32 thread on it - but double check your bolt. |
|
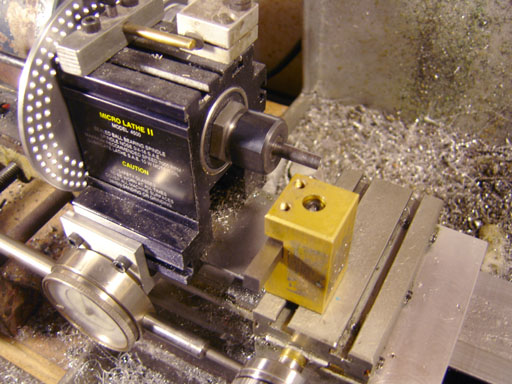
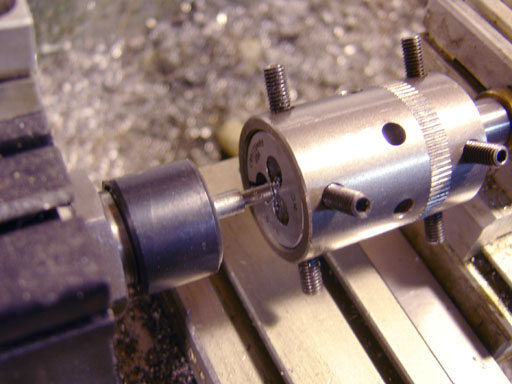
I chucked a length of 1/4" mild steel (might be free machining, but I'm not sure as it came from the scrap bin) in a collet. Notice that I have a dial indicator hooked up to the Taig - this is handy for small work with a variety of lengths. |
|
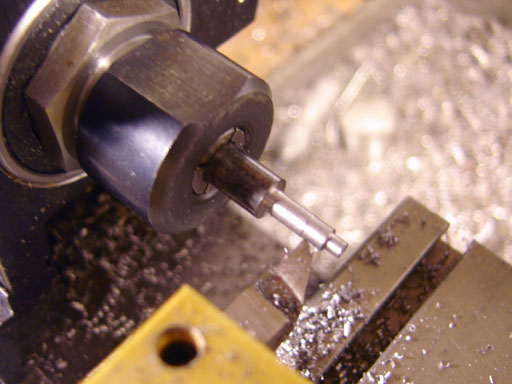
Turning the diameters, one step at a time starting from the end. |
|
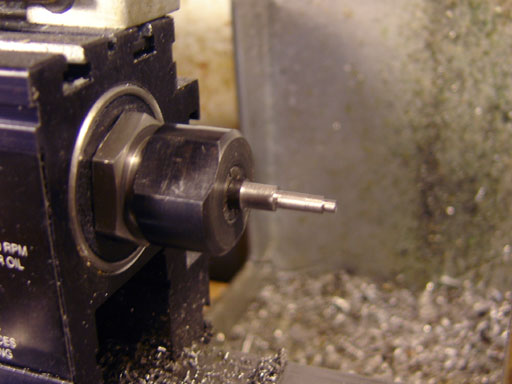
Finished turning the diameters. I left the end a little long for parting. |
|
Cutting the #6-32 thread with a die in the die holder. I cut the thread and then flipped the die around so it would cut almost square up to the shoulder. Use a good quality die that allows this if possible. |
|
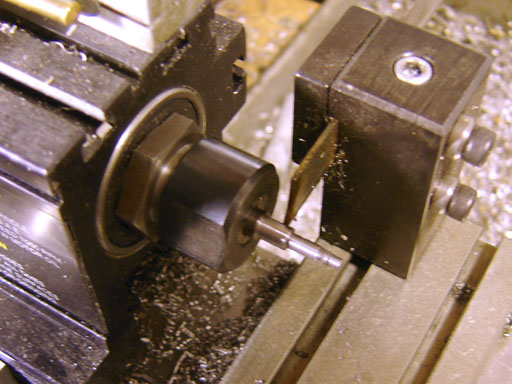
Parting the screw off the stock. |
|
I faced off the small pip left by the parting operation. |
|
Used a file (carefully! don't hit the chuck jaws) to form a "looks right" screw head. You could make a form tool for this, but it's just a one-off job so I didn't bother. I then polished the screw with a Scotchbrite pad. |
|
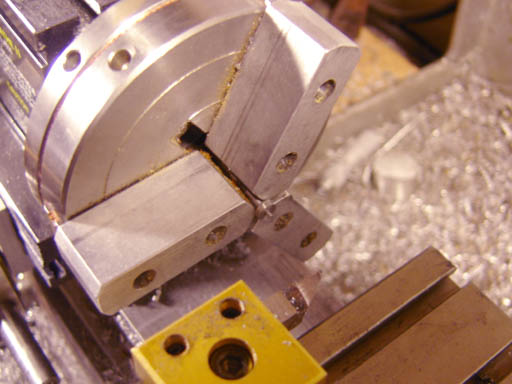
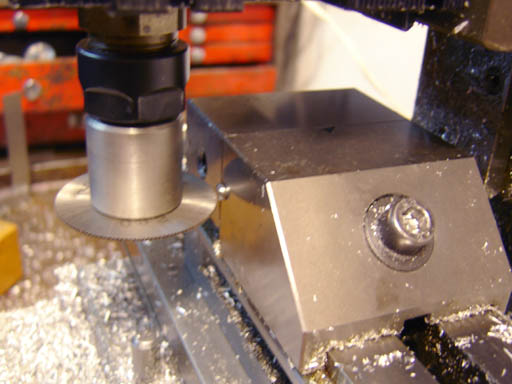
I set the screw up in the mill, chucked a .032" thick saw up, found the center of the screw (with spindle off, bring saw down on OD of head with paper in between until it just grabs, then move away from the head and down 1/2 the thickness of the saw and half the diameter of the screw head) Slot across. |
|
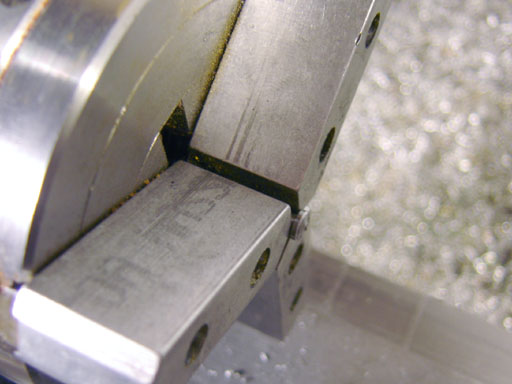
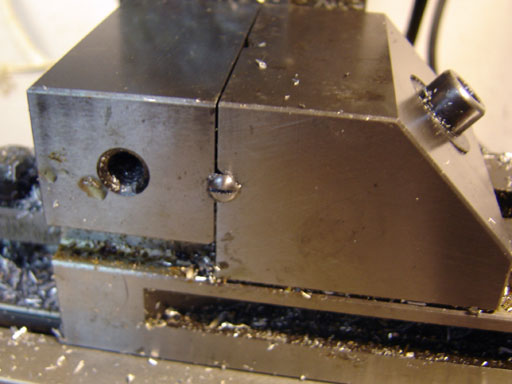
The vise has a handy vee groove that is great for work like this. |
|
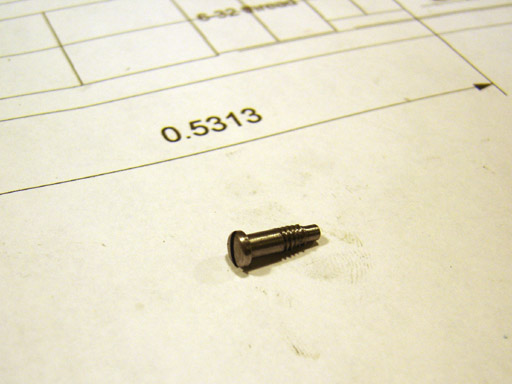
The finished screw. |
|
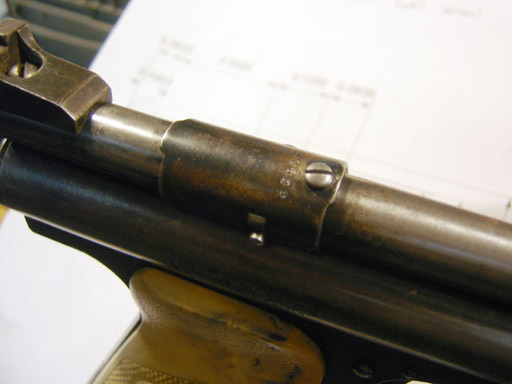
Mounted in the pistol, fits fine and now it looks as it should. If the pistol's blueing was in better condition I'd blue the screw, but I don't think I'll bother. |
|
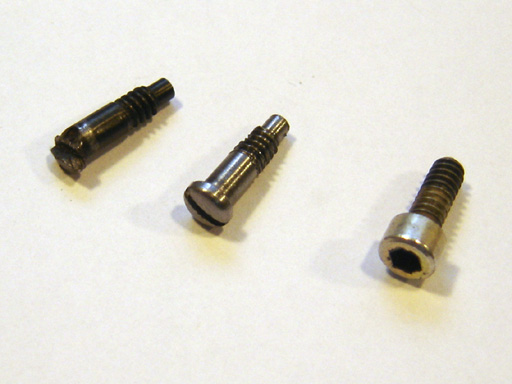
I found the old screw! You can see it on the left. Note that I wasn't the savage that broke the head off, that was the previous owner. The allen screw was what I used for a while until it bugged me enough to make the new screw. |
|
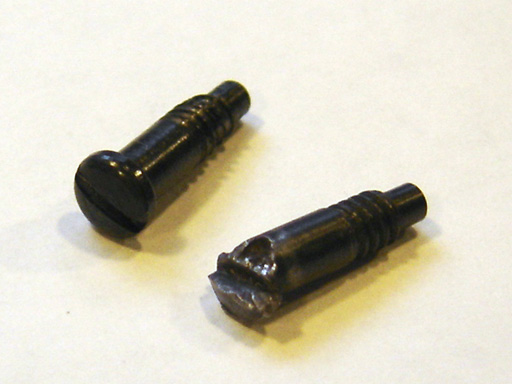
I dug out my bottle of cold blue and blued the screw. It does look better blued. |