This little project was an attempt to fix two shortcomings of the excellent new ER16 spindle that Taig offers. While the ER16 spindle allows a wide range of tooling to be used with the Taig Milling Machine there is no easy way to set the tool's depth when multiple tools are to be used in a CNC program. The other shortcoming is that the ER16 spindle requires the use of two wrenches to tighten, while holding the tool in the collet, so that when loosening or tightening there is a danger the tool will drop down, onto the part, possibly breaking the tool. With those two problems in mind I made the following depth stop.
The stop requires that you drill and tap the end of the pulley 7/16"-20, as shown. The magnet I used was a little long, and you may want to omit the magnet all together if you are milling steels enough to be irritated by the magnetism of the tool that may occur. The stop body is turned to a loose fit in the spindle bore. I found mine was .405, but I urge you to confirm that on your spindle, you can always use the spindle as a gage while you turn to the final diameter. Nothing is really critical, and tolerances can be loose.
See below for Jim Stoll's experience with the depth stop.
|
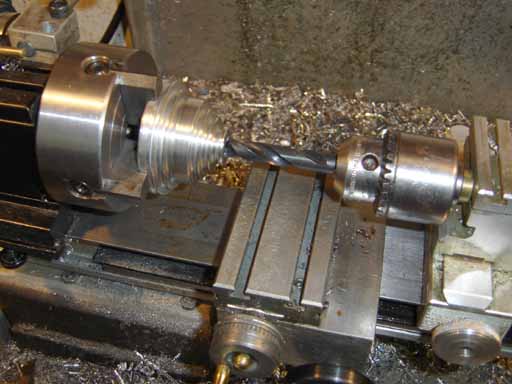
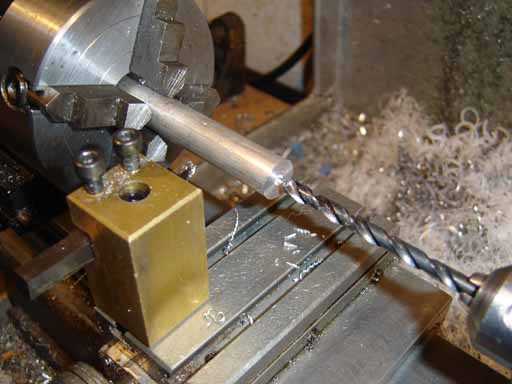
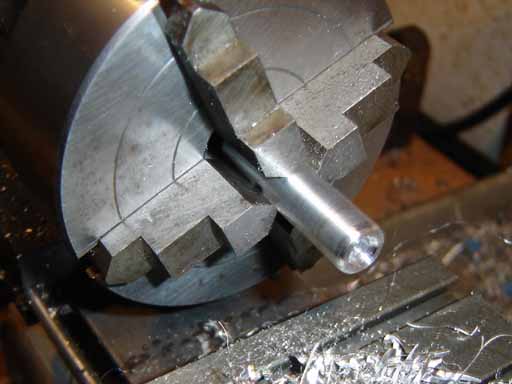
Drilling the Pulley for the 7/16"-20 tap. Try and keep this concentric. |
|
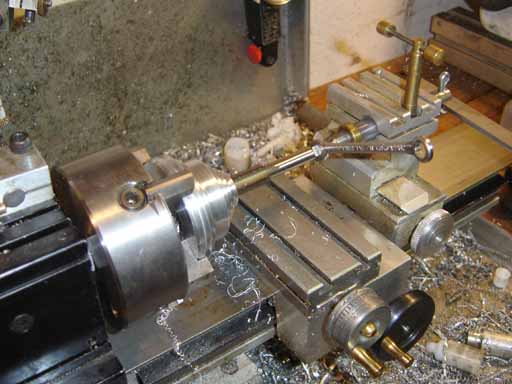
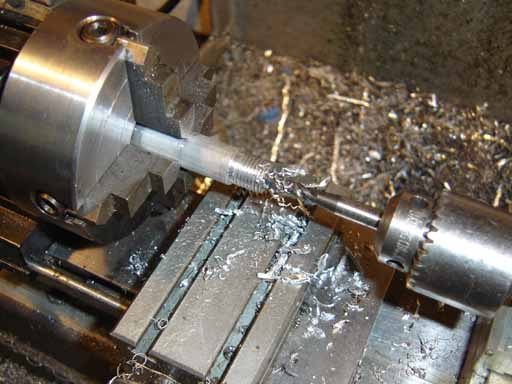
Tapping the pulley manually using the lathe to align the tap. |
|
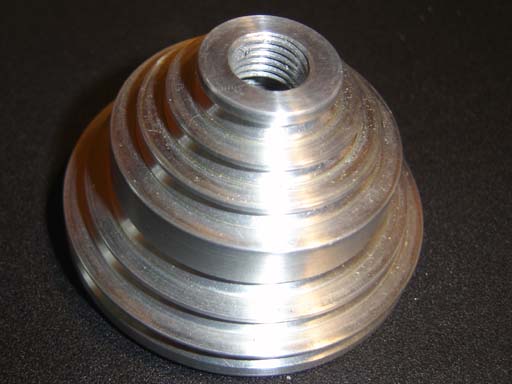
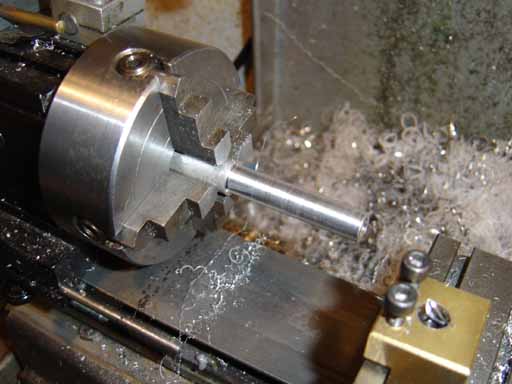
The tapped pulley. |
|
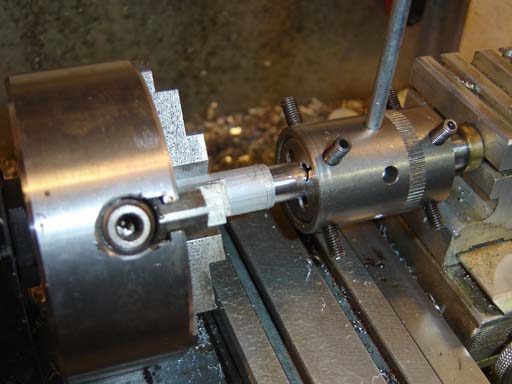
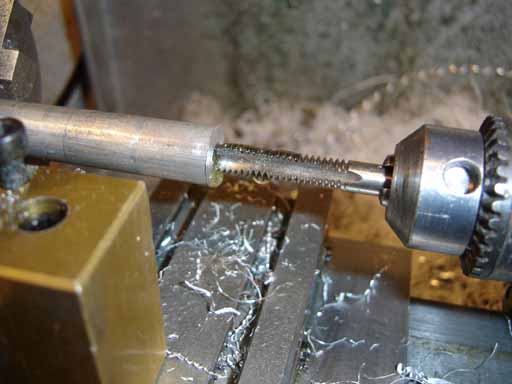
Putting a 7/16"-20 thread on the bushing that screws into the pulley, manually using the Taig die holder. |
|
Tapping the bushing 1/4"-20, manually using the lathe to align the tap. |
|
Drilling the stop body. |
|
Tapping the stop body, manually. |
|
Turning the stop body to .405 |
|
The stop body is turned around, a radius filed and a hole drilled for a press fit on the magnet - in my case it was some weird size that required a #14 drill... |
|
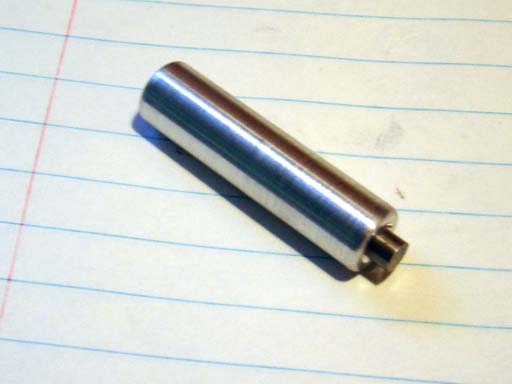
The finished stop body. Use a magnet that has a flat end and enough holding power for a 3/8" endmill. |
|
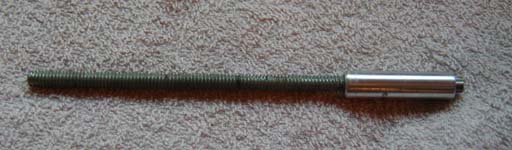
The threaded rod screwed into the body. |
|
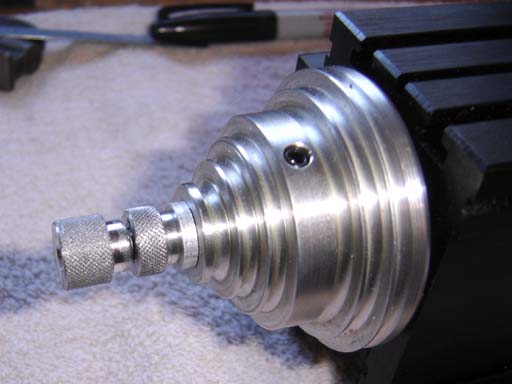
The unit assembled, with a nut loctited on the end of the threaded rod and a checknut for locking the depth adjustment. |
|
Detail of the knurled end nut and the check nut. |
|
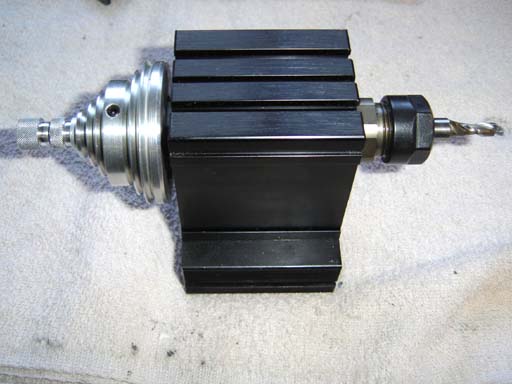
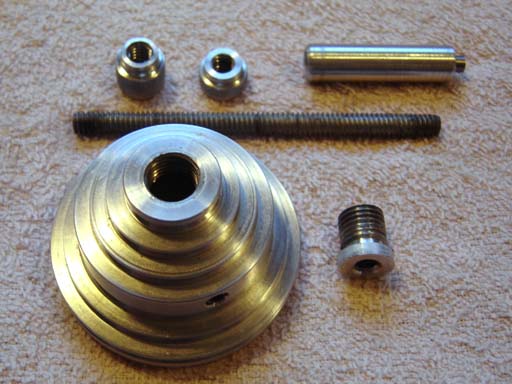
Components... |
Back to cartertools.com
Had a funny (in
hindsight now :-) experience this evening, related to the awesome
little end mill stop gizmo you'd clued me into a month or two ago. (The
stop inside the spindle that allows consistent setting of tool z
positions.)
I have easily made 1000 tool changes with this gizmo
now, and it has been working flawlessly. I've noticed of late that my
belt has been making more noise than usual, and tonight, I was finding
that I no longer had sufficient height above my workpiece to remove the
end mills from the collet at my standard tool change height (which has
been my 'standard' height for the past 1000 or so tool changes, and has
worked fine). All I could figure was that the little aluminum plug in
the spindle must be getting worn, and allowing the end mill to go
further up into the spindle, gradually decreasing the effective height
of the end of the spindle. So, I pull the gizmo out, and there is no
significant wear on the aluminum plug. As I'm puzzling
through what else could be the problem, I notice that my belt is at a
bit of a skewed angle - the motor pulley is lower than the spindle
pulley - which would account for the new belt noises. AND, it turns
out, also for the gradually lowering spindle bottom position relative
to the workpiece. Apparently, all of the little teeny pushing up
motions of the end mill on the aluminum stopper as I snug down the
collet have slowly been pushing my spindle pulley up on the spindle.
:-) (collet pushes end mill, end mill pushes stopper, stopper
pushes threaded rod, threaded rod pushes threaded plug threaded into
the spindle pulley, spindle pulley creeps upward on the spindle,
despite the set screw being fairly snug) I loosened the set screw and a
gentle tap with my mallet dropped the spindle pulley visibly on the
spindle. I reinserted the stopper, tightened everything down
(especially the pulley set screw) and all is good again - I can once
again remove my end mills from the spindle at my standard height, and
the belt is back to being much quieter Go figure. :-)
Anyway, once
the problem was identified, I got a good chuckle out of it (especially
since I'd started imagining all kinds of highly-inconvenient things
that could be the problem...), and thought you might, as well. Be sure
to check your pulley position and set screw height if you're using the
stopper frequently!! :-) Thanks Again for the great advice on that
stopper - it has truly been a lifesaver.