The Taig 1030 4 Jaw independent chuck is a versatile and strong
accessory. I generally prefer to use it for round work over the 1050 3 jaw chuck
as it grips strongly, and the work can be trued to almost no runout in a few
minutes. Truing work in the 4 jaw chuck can be daunting to the novice however,
as it requires the use of a dial indicator to true the work. Here are some pictures
and notes about the process of chucking round work in the 4 jaw chuck.I may
add more details on truing other work if people want.
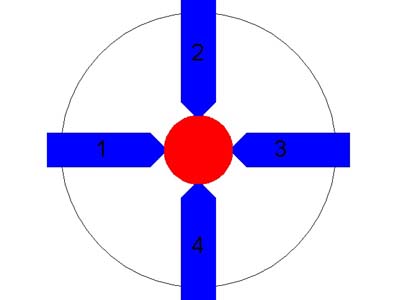 |
The 4 jaw chuck. We want to true work by pairs of jaws. Get the work
centered as close as possible by eye. Use the rings scribed on the face
of the chuck as a guide.
If we loosen jaw #3 and tighten jaw #1, The work (the red circle) will
move to the right. If we loosen jaw #1 and tighten jaw #3, then the work
will move to the left.
Always loosen one jaw before tightening the other jaw.
|
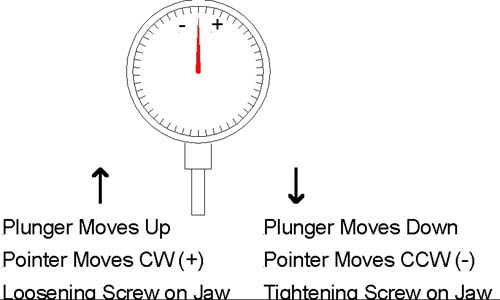 |
A dial indicator. When the tip of the plunger is rested on the work in
line with one of the jaws, the dial set to zero, then you can rotate the
chuck 180 degrees and see which way the pointer moves, and how much. You
want to adjust each jaw half of the pointer movement, in stages. Take
it slow and check the indicator often, as it is your friend!
Tightening the screw on the jaw bearing on the side of the work the indicator
plunger is bearing on will cause the pointer to move CCW, after loosening
the opposite jaw.
Loosening the screw on the jaw bearing on the side of the work the indicator
plunger is bearing on, and tightening the screw on the other side,
will move the pointer CW
Always view the dial square on, so you don't make an error.
|
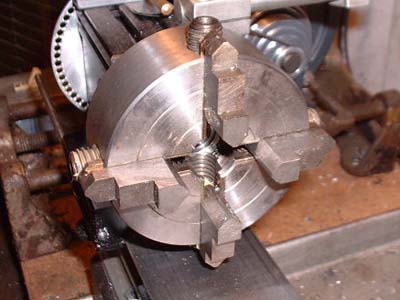 |
The chuck opened up to accept the work |
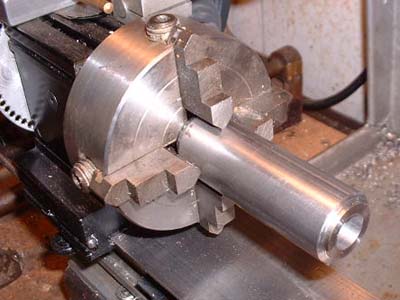 |
A 1" bar chucked and roughly aligned by eye. |
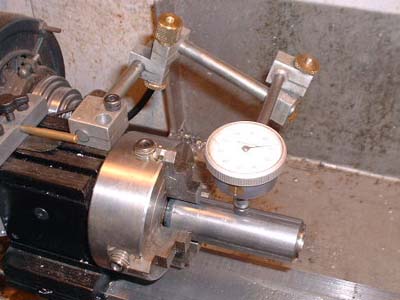 |
How I use an indicator on the lathe. It is a bit more cumbersome
to measure from the top, as the opposite screw is harder to access but I
prefer to look at the top of the taig due to it's height. I made the indicator
holder and it is always mounted and ready to use. |
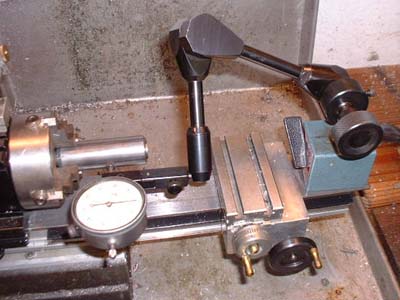 |
Using a typical large magnetic base. |
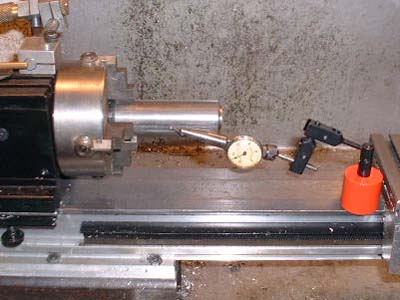 |
A small test indicator magnetic base. You can also use the
toolpost to hold an indicator. A test indicator will usually give a more
accurate result but allows less leeway in setting up as the range is smaller
(as is the dial) You can get it close with a .001 indicator then switch
to a .0005 or even a .0001 if you are feeling somewhat crazy. |
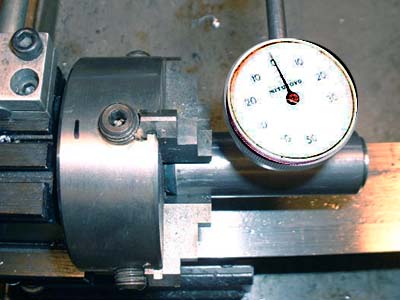 |
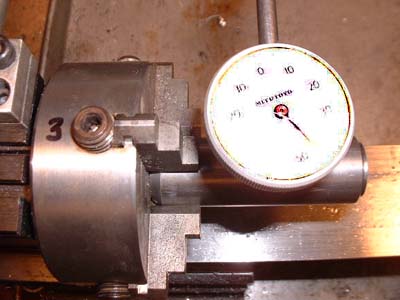
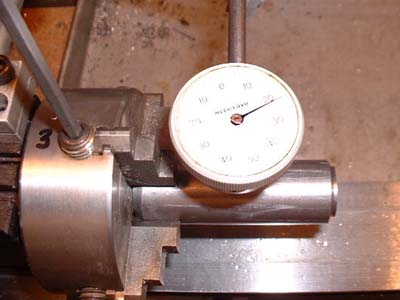
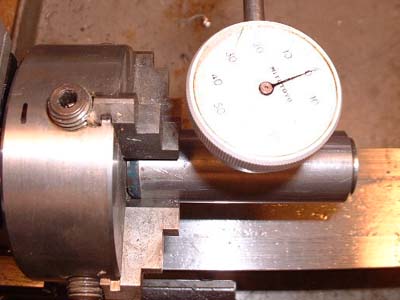
Indicator at Jaw #1, the dial has been turned so the pointer
is at zero. Indicators are relative, rather than absolute measuring instruments,
so don't be afraid to rotate the dial. |
 |
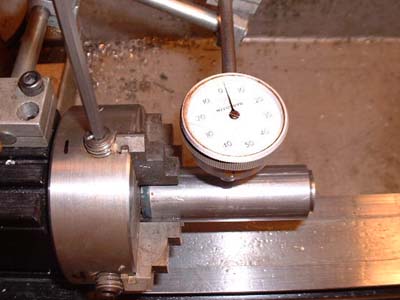
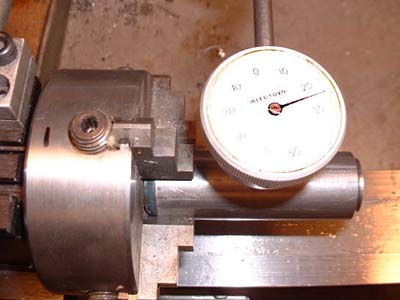
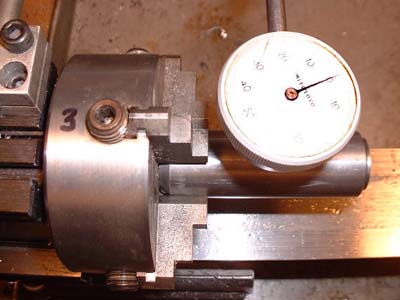
The opposite jaw reading (remember it was set to zero on jaw 1) showing
the runout is about .045"
Sorry about the poor quality of the pictures, I got too much shine from
the dial indicator crystal.
|
 |
Rotated back to #1, I loosen the jaw a tiny bit |
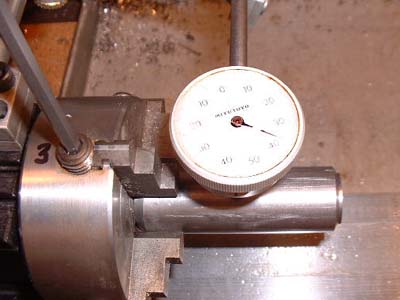 |
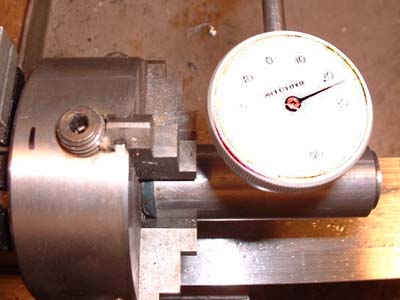
rotated back to #3 and the jaw is screwed in, moving the work
away from that side, and causing the pointer to move CCW (about .038") |
 |
#1 is now at about .011, so we have runout now of .038-.011
or about .027 runout. Getting better. Loosening the screw on #1 again a
bit |
 |
Tightening the screw on #3 now moves the pointer to about
.022" |
 |
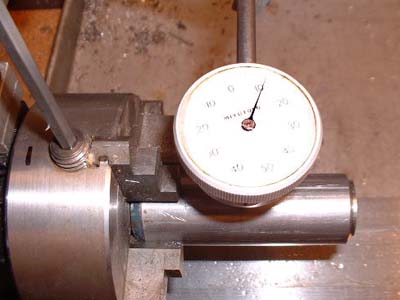
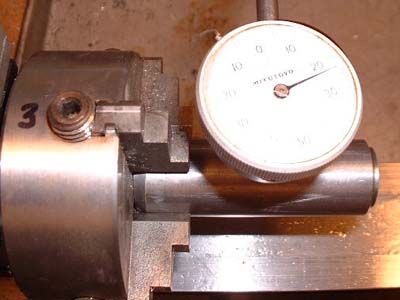
And #1 is now reading about .024" I have overcompensated
a tiny bit, but the runout is now about .002" |
 |
One more adjustment (loosening #3 and tightening #1) and I
get the #1 jaw to read .023" |
 |
Which means the #3 jaw also reads .023" Don't be afraid
to rezero the dial if you start forgetting where each jaw is - it can be
convenient to always make jaw #1 zero. |
 |
rezeroing the #1 jaw |
 |
and rotating around #3 is also at zero.The work is now true between #1
and #3. You now repeat the process for jaws #2 and #4, then recheck #1
and #3 in case you threw everything off a bit.
Remember that round stock is rarely round, and sometimes not that straight,
so try and true it at an average point.
Believe it or not, it only took me the few iterations above to true the
work. Sometimes it takes longer, especially when trying to get to .0005
or less runout. You can use the same technique to indicate a bore true,
using a test indicator or hole attachment.
|