Machining Jewelry on the Taig CNC Milling Machine

Experiments in Rapid Prototyping, Direct Production and Die Making

By Nick Carter, June 12th, 2007

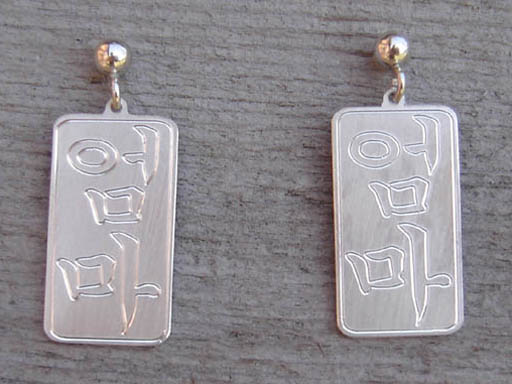
For the past few months I have been playing with various methods for producing jewelry with my Taig CNC milling machine. Felice and I have been making jewelry for 20 years, but I haven't worked at it much since the kids came along. This changed when we started our store on etsy.com, which allowed us to show pieces that were a bit unusual 
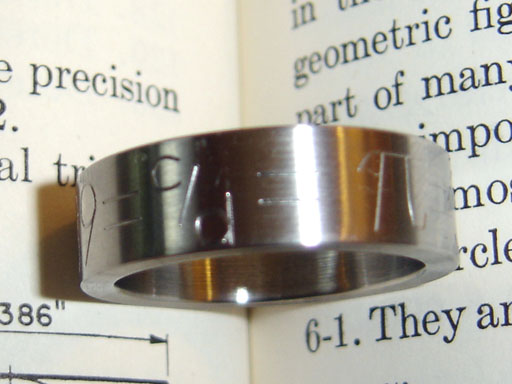
(geeky) which wouldn't ordinarily sell in our usual venues. I have achieved a small measure of success (that is, I have sold them!) with the designs shown in this article.

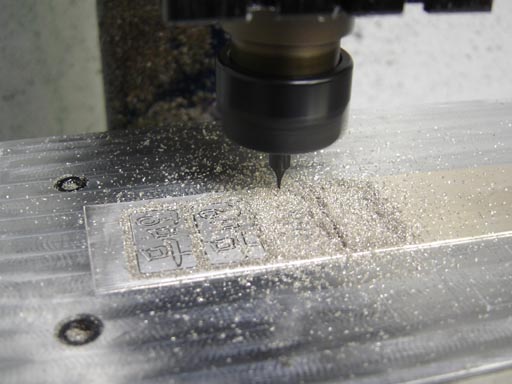
Often jewelers will buy a CNC milling machine for one purpose, to make waxes used in investment casting. I think that in order to innovate or just to use a machine that may lay idle between custom waxes, a jeweler needs to look at tools not for what they know they can do or what they bought them specifically for, but what they might be able to do. So, in the spirit of thinking outside the box I embarked on the series of experiments shown here.

Part 1: Milling Jewelry
Part 2: Engraving Jewelry
Part 3: Milling Dies for Hydraulic Die Forming

Engraving Jewelry

The toolpath for engraving 2 pairs of earrings with the Hangul (Korean script) for Omma (mom). Because I will use a 140 degree diamond tipped drag tool, I set the depth to be about .002" deep. Depending on the tip angle, and whether it is a drag or cutting tool you may need different depths.
The toolpath for milling the outline as seen in part 1 of the article.
Engraving the text. Usually a diamond drag tool is used in a "floater", a spring loaded holder that allows it to handle uneven thickness or curved surfaces. Because I mount the work on a flat surface, I don't bother. I find it allows me to get a stronger line.
One pair milled out.
Milling, I tend to sweep up the chips and save them in a bag for refinining. It does pay to save your scrap silver!
The finished earrings. I find a brushed finish put on the silver before engraving makes the text show up. I usually (always) have to debur the edges with a fine file.
Milling a keyring. The text was engraved with a split 90 degree carbide engraving tool. In this case I went .010 deep, which with a 90 degree tool gives a .020" wide line.
For the key rings I needed to use coolant (pure copper is a pain!) so I held the sheet with clamps against the aluminum and programmed a milling toolpath to leave small "sprues" at 90 deg. around the work. These are snipped and the edges deburred with a file.
The finished keyring.
Milling 15 pairs of earrings at a time. I did them one pair at a time, but fixturing like this allows a pretty fast workflow.

What happense when you switch between engraving and milling programs. I could program a tool change in one large program but I find doing separate programs allows modifications to be made more easily to either. The downside is that when you get tired you can make mistakes:

1) Milling the engraving toolpath.

2) Setting the engraving tool depth to the same depth as the milling tool...

Layout of text for engraving Pi around the circumference of a stainless steel ring. The toolpath is converted from y to a axis moves in Bobcad.
Engraving on the 4th axis on the Taig milling machine
I used a 120 degree diamond tool.
The engraved ring. I have sold 2 of these so far...

Part 1: Milling Jewelry
Part 2: Engraving Jewelry
Part 3: Milling Dies for Hydraulic Die Forming

Back to cartertools.com